Rc Tutorial | How To Use Set Up Wheels On 1/10 M Chassis
Do you know how to tune the camber angle for modifying the car performance on the track?
It is important for the RC racer, as one tuned section of the car will influence the car performance.
One setting may help you win the game.
I believe not every racer know what is the camber angle is important in the RC car.
What is the logic behind the positive and negative setting in the camber angle? And how to change and measure the camber angle?
Let's check out it now!
Product Features:


Video:
Tutorial:
In this lecture, I will use Yeah Racing new Aluminum Set-Up Wheels on 1/10 M Chassis & Xpress Execute XM1 1/10 Touring Car to show you the tuning process.

Before the tuning process, we should know the theory about the camber angle!
What is Camber?
Camber is the angle of the tops of the wheels from straight up and down.
Leaning in is Negative Camber, leaning out is Positive Camber.
The following photo is showing you the feature when you changed the camber!

So, we now go to the tuning process now!
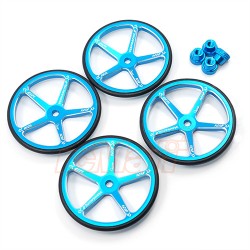
We will use Yeah Racing Aluminum Set-Up Wheels For 1:10 M Chassis to set up the Camber.


When you get all the Yeah Racing Aluminum Set-Up Wheels up to the chassis, you are ready to set the camber now!

Camber is usually adjusted by turnbuckles that pivot the wheel from the lower outer hinge pin.
Some cars use what’s called a Pivot Ball Suspension… the steering block is attached to the A-Arm by a Pivot Ball.
Screwing the upper Pivot Ball in will add Negative Camber, while unscrewing the same Pivot Ball will remove Camber, setting it closer to 0deg.

We need to have a camber gauge to measure the degree of the camber angle.
To assume you get a car without any tuning that camber is 0 degree.
(Note: Don't use the camber gauge in the screw area that will influence the measurement)

Tuning with Camber
Giving one end of the car less Camber gives that endless traction.
For instance, if your car is loose (oversteer), you could either add a degree of rear Camber (recommended) or take out a degree of front Camber.
Oddly enough, Camber works a little differently on either end of a touring car.
On the front, you should use roughly around -1 to -2deg of Camber.
It is rare that you will use more than that.
There is a point where you can add TOO much front Camber.
If so, steering will decrease as the tires will roll OVER the perfect contact patch area.
On the rear, Camber affects two things. In a straight line, maximum acceleration is achieved with 0 degrees of Camber.
Adding Camber reduces forward traction slightly, but you will gain cornering grip.
So, there is a fine line on rear Camber.
Starting at about -1deg is your best bet, and work from there.

-2deg to -3deg of negative Camber is the norm for most vehicles.
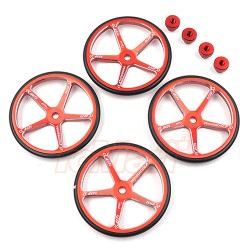
Aluminum Set-Up Wheels For 1:10 M Chassis #YT-0142

Setup your M-Chassis car with precision by using these setup wheels!
By using these M-Chassis setup wheels you will be sure that the geometry will be as per racing conditions so you will get the most accurate readings possible!
Used to measure camber and other things.
Also comes with setup wheel nuts, so you don't scratch these setup wheels if you were to use serrated nuts.
Quick Features
- For: 1/10 M Chassis
- Material: Aluminum


